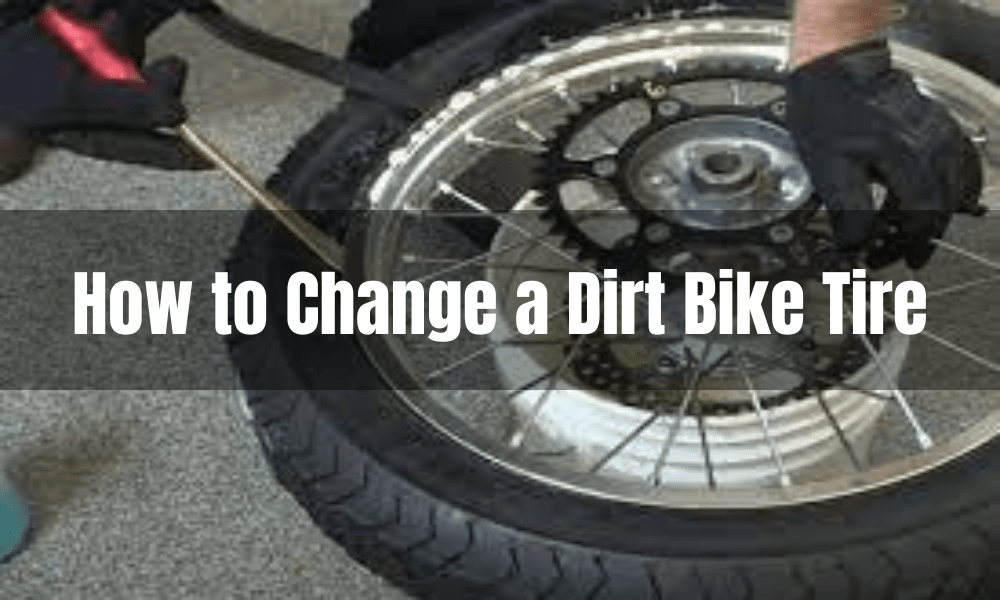
How to Change a Dirt Bike Tire
Changing a dirt bike tire can seem like a daunting task, but with the right tools and a little bit of know-how, it’s a fairly straightforward process. Whether you’re a seasoned pro or a beginner, this guide will walk you through the steps of changing a dirt bike tire, from gathering the necessary tools to taking the bike for a test ride. Not only will changing your own tire save you time and money, but it will also give you the peace of mind that comes with knowing your bike is in top condition. So grab your tire iron, valve stem tool, and new tire, and let’s get started!
Remove the old tire
Removing the old tire from your dirt bike is the first step in the process of changing it. It may seem like a daunting task, but with the right tools and a little bit of know-how, it’s a relatively easy task. In this guide, we will walk you through the process of removing the old tire from your dirt bike, step by step, so you can be sure your new tire is installed properly.
Before you begin, it’s important to gather all the necessary tools, including a tire iron, a valve stem tool, and make sure the bike is on a stable stand. It’s also important to deflate the tire completely by removing the valve stem cap, this will make the process of removing the tire much easier. With the right tools and preparation, you’ll be able to remove your old tire quickly and efficiently and be on your way to installing your new tire in no time.
Inspect the rim
Inspecting the rim of your dirt bike is an essential step in the process of changing a tire. The rim is the foundation on which the tire sits, and any damage or wear can affect the performance and safety of your bike. By thoroughly inspecting the rim, you can ensure that the new tire will be properly seated and balanced and that your bike will be safe to ride.
Before you begin, it’s important to have a clean and clear workspace and to have the necessary tools on hand, including a tire iron and a valve stem tool. Once you have removed the old tire, take the time to thoroughly inspect the rim for any damage or wear, paying special attention to the bead seat, and the area where the tire sits on the rim. Look for any dents, scratches, or other signs of damage, and make sure the rim is clean and free of debris. By following these steps, you can ensure that your new tire will be properly seated and balanced and that your bike will be safe to ride.
Install the new tire
Installing a new tire on your dirt bike is a crucial step in ensuring the performance and safety of your bike. A properly installed tire will provide better traction and handling, and it will be less likely to suffer from punctures or other types of damage. In this guide, we will walk you through the process of installing a new tire on your dirt bike, step by step, so you can be sure your new tire is installed correctly.
Before you begin, it’s important to have all the necessary tools on hand, including a tire iron, a valve stem tool, and a new tire. Make sure that the rim is clean and free of debris, and that the new tire is the right size and type for your bike. Once you have prepared the rim, it’s time to install the new tire. Align the valve stem of the new tire with the valve stem hole of the rim, and gently press the tire onto the rim.
Slowly inflate the tire to the recommended pressure, making sure that the bead of the tire is properly seated in the rim. This step is critical to ensure that the tire is properly seated and that it will not come off while riding. With the right tools and preparation, you’ll be able to install your new tire quickly and efficiently and be on your way to taking your bike for a test ride.
Inflate the tire
Inflating the tire on your dirt bike is an important step in the process of changing a tire. The correct tire pressure is crucial for the performance, safety, and longevity of your bike. In this guide, we will walk you through the process of inflating the tire on your dirt bike, step by step, so you can be sure your new tire is at the correct pressure.
Before you begin, it’s important to have a tire gauge on hand, as well as a bike pump or an air compressor. It’s also important to check the recommended tire pressure for your bike, as this can vary depending on the make and model. Once you have installed the new tire on the rim and made sure it’s properly seated, it’s time to inflate the tire. Slowly inflate the tire to the recommended pressure, using a tire gauge to ensure the proper pressure is reached. It’s important to not over-inflate the tire, as it can cause damage to the tire and the rim, and can also make the ride uncomfortable.
Mount the tire
Mounting the tire on your dirt bike is the final step in the process of changing a tire. It is important to ensure that the tire is properly mounted, as it will affect the performance, safety, and longevity of your bike. In this guide, we will walk you through the process of mounting the tire on your dirt bike, step by step, so you can be sure your new tire is properly mounted.
Before you begin, it’s important to have all the necessary tools on hand, including a tire iron and a valve stem tool. The tire should be properly seated and inflated before mounting, so you can ensure that the bead of the tire is properly seated in the rim. Once the tire is properly seated, use the tire iron to mount the tire onto the rim, making sure the bead of the tire is properly seated in the rim.
It’s important to check that the valve stem is properly seated and tightened, and replace the valve stem cap. This will prevent the air from leaking out of the tire, and ensure that the tire stays properly inflated. It’s also important to check that the tire is properly balanced by spinning it and checking for any wobbles or unevenness. If necessary, add small weights to the rim to balance the tire.
Check the valve stem
The valve stem is the small component that allows you to inflate and deflate the tire, and it is important to ensure that it is properly seated and tightened. In this guide, we will walk you through the process of checking the valve stem on your dirt bike, step by step, so you can be sure your new tire is properly maintained.
Before you begin, it’s important to have the necessary tools on hand, including a valve stem tool. Once the new tire is properly seated and mounted, it’s time to check the valve stem. Make sure the valve stem is properly seated and tightened, and replace the valve stem cap. This will prevent the air from leaking out of the tire, and ensure that the tire stays properly inflated.
Balance the tire
An unbalanced tire can cause vibrations and wobbling while riding, which can be uncomfortable and can also cause damage to the bike and the rider. In this guide, we will walk you through the process of balancing the tire on your dirt bike, step by step, so you can be sure your new tire is properly balanced.
Before you begin, it’s important to have a balancing stand or balance beads on hand and make sure the new tire is properly mounted and the valve stem is properly seated and tightened. Once the new tire is mounted, spin it and check for any wobbles or unevenness. If necessary, add small weights to the rim to balance the tire.
Balancing the tire will help ensure that the tire is properly seated and that it will not come off while riding. This step is critical to ensure that the tire is properly balanced and that it will provide a smooth and comfortable ride.
Test ride
it’s important to have all the necessary tools on hand, including a tire gauge and a valve stem tool. Make sure that the new tire is properly mounted, and balanced, and that the valve stem is properly seated and tightened. Once you are sure that the tire is properly installed, it’s time to take the bike for a test ride.
During the test ride, pay attention to the bike’s handling and stability. Check if the bike is vibrating or wobbling if the steering feels normal and if the tire is providing a good grip. Also, check the tire pressure to ensure it’s still at the recommended level.
By taking the bike for a test ride, you can ensure that the new tire is properly installed and that there are no issues with the tire or the installation. It will give you peace of mind and confidence that your bike is ready for your next adventure.
Double-check
it’s important to have all the necessary tools on hand, including a tire gauge and a valve stem tool. Make sure that the new tire is properly mounted, and balanced, and that the valve stem is properly seated and tightened. Once you are sure that the tire is properly installed, it’s time to double-check the installation.
Start by checking that the tire is properly seated and tightened, then check the valve stem to ensure it’s properly seated and tightened and that the valve stem cap is in place. Finally, check the tire balance by spinning it and checking for any wobbles or unevenness.
By double-checking the tire installation, you can ensure that the new tire is properly installed and that there are no issues with the tire or the installation.
Frequently Asked Questions (FAQ)
How much does it cost to change a dirt bike tire?
Answer: The cost of changing a dirt bike tire can vary depending on several factors, such as the type of tire, the brand, and where you have it done. On average, you can expect to pay between $40-$150 to have a professional change a dirt bike tire. However, if you do it yourself, the cost will only be for the price of the new tire and any necessary tools.
How long should it take to change a bike tire?
Answer: It should take around 30-60 minutes to change a bike tire.
Consolation
Changing a dirt bike tire can be a daunting task, especially if you’re new to the process. However, with a little bit of knowledge and the right tools, it’s a relatively straightforward process. Remember to take your time and work methodically, and don’t be afraid to ask for help if you encounter any unexpected issues. With a little bit of practice, you’ll be changing your own dirt bike tires in no time. And once you’ve mastered the process, you’ll have the confidence and peace of mind that comes with knowing that your bike is in top condition. So don’t be intimidated, give it a try and see for yourself!